

Posted by: Numerical Comments: 3 Post Date: October 20, 2020
How to Disable Press-to-Test Mode Using Student’s Software
Numerical Analytics > [How to Disable Press-to-Test Mode Using Student’s Software]

This blog is guide on “How to Disable Press-to-Test Mode Using Student’s Software”. Follow the steps to below:
If you choose to disable Press-to-Test mode through a computer, you must have TI-Nspire Students software installed on your system. After installing TI-Nspire Students software :
Create a folder on your computer called “Press-to-Test”
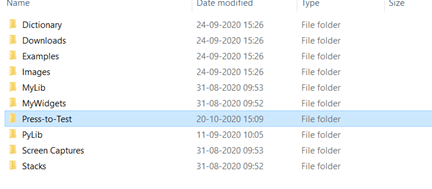
In that folder, place an empty tns document called “Exit Test Mode”.
- Steps to create tns file through student’s software.
- Open the software
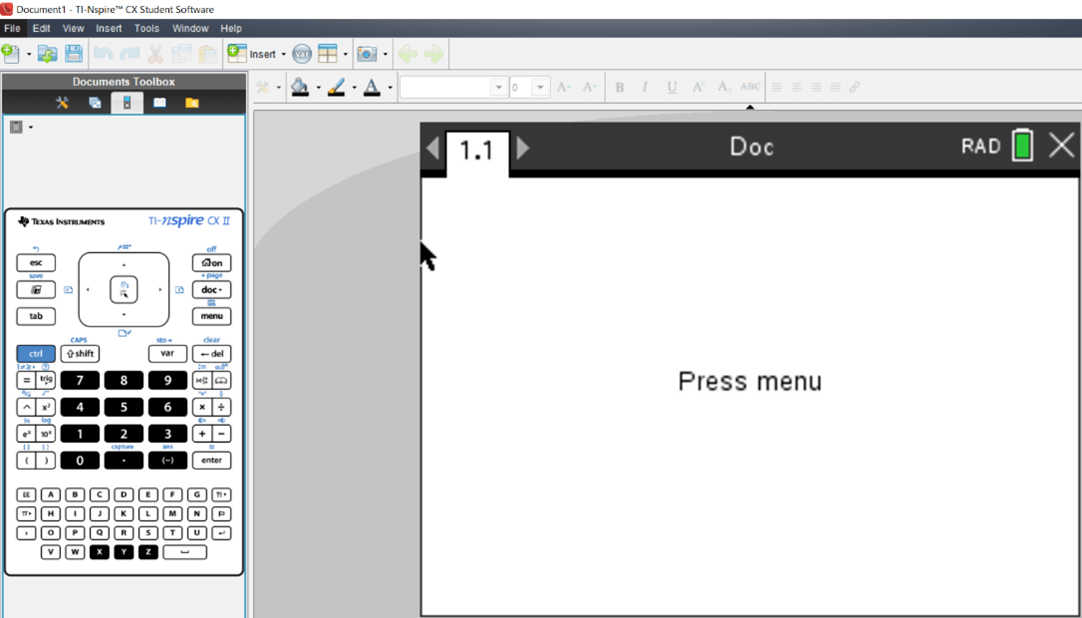
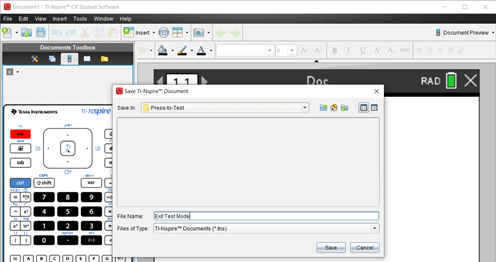
- Without altering anything inside the document go to file
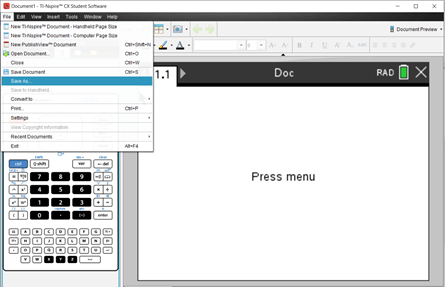
- Select Save-as
- Now select the folder created above.
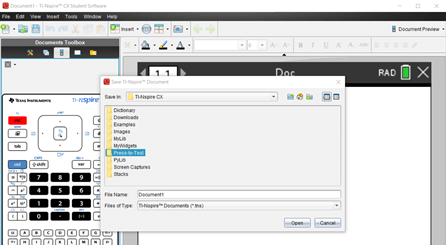
- Save the file with name “Exit Test Mode” and hit Save
- This file is the only file that should be in that folder.
Note: folder and file names are case-sensitive
Send this file to your connected device and you will exit Press-to-Test mode
- Step to send TNS file into handheld:
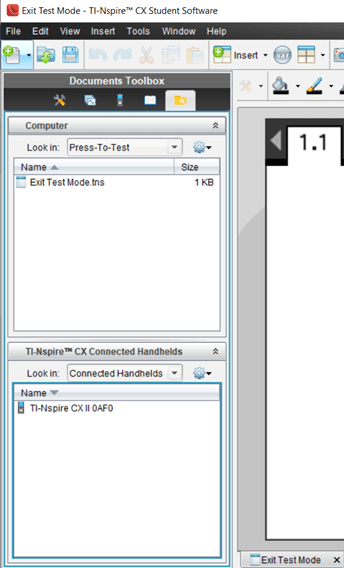
- Make sure you have attached the Handheld with your software via USB cable
- Now open your student’s software and select document section(yellow icon) from the document toolbox.
- Now Select your Handheld model from below column and double click on it.
- It will Open the “Press-To-Test” folder
- Drag the TNS file from computer and drop it in the above folder.
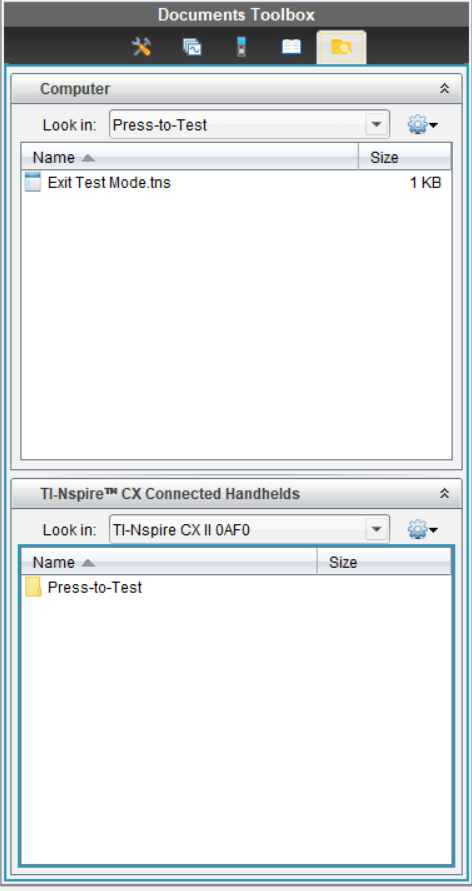
Finally drag the TNS file from computer to connected handheld.
Make sure to follow our other Blogs to get the best out of your TI-Nspire:
- How to Download Latest Operating System in TI Nspire CX II
- How to Disable Press-to-Test Mode Using Student’s Software
- TI-Nspire Tips and Tricks You May Not Have Known!
- Law of Sines and Cosines – Resources for Teachers and Students


 Copyright © 2020 | ® Numerical Analytics Instruments Pvt. Ltd | All Rights Reserved.